Mastering Trezor.io/Start — Full Setup Tutorial for New Crypto Users
This blog covers user-friendly instructions for mastering the Trezor onboarding process.
Why Trezor Is Preferred
Crypto users choose Trezor for:
- Open-source architecture
- Proven security
- User-friendly interface
Using Trezor.io/Start Correctly
The site guides you through:
- Downloading Trezor Suite
- Setting up PIN protection
- Seed generation and backup
- Wallet customization
Trezor Suite Highlights
- Buy/sell crypto directly
- Track market prices
- Enable Tor
- Access hidden wallets
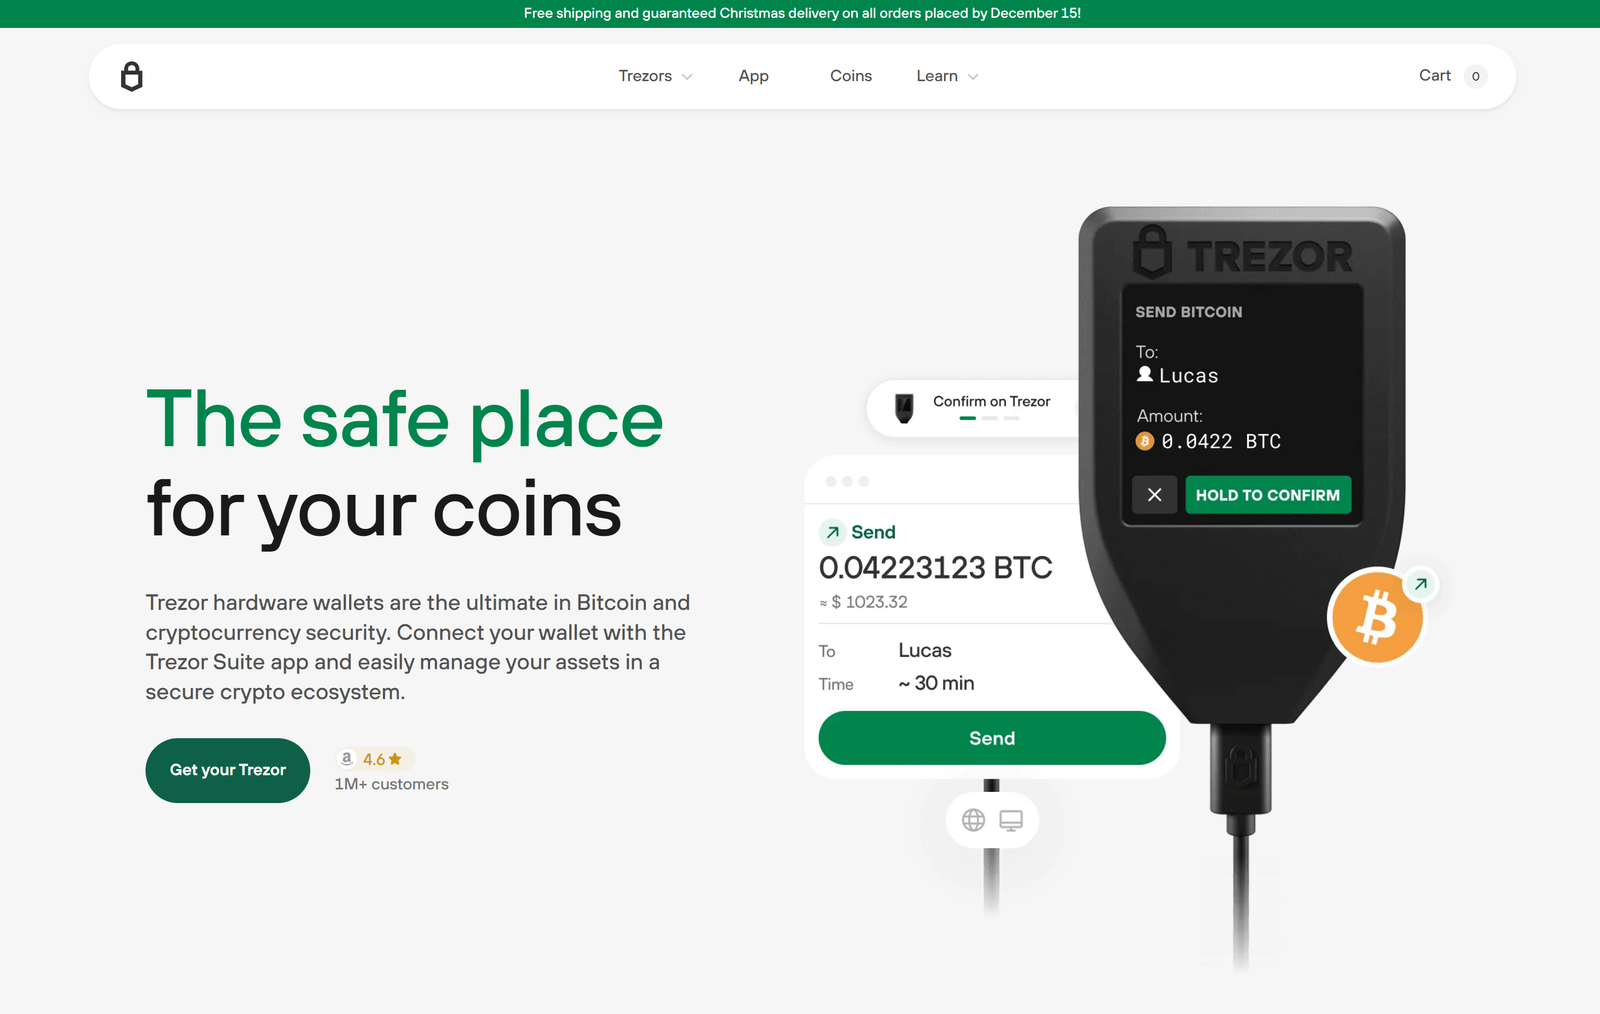
Wallet Initialization
You’ll generate your recovery seed using your hardware device. Confirm each word on the screen to prevent phishing.
Transactions
Sending and receiving crypto is simple with Trezor Suite’s clean interface.
Protection Features
- Device lock timer
- Phishing warnings
- Firmware verification
- Offline key storage
Long-Term Maintenance
Always visit the official site for updates and periodically check for firmware releases.
External helpful resource:
➡️ https://wiki.trezor.io
Getting started with a hardware wallet can feel overwhelming, but Trezor.io/start v24.12.3 makes the entire process smooth, secure, and beginner-friendly. Whether you’re setting up your first Trezor Model One or upgrading to the premium Model T, this step-by-step guide will help you understand every essential feature. With cybersecurity risks increasing worldwide, learning how to properly initialize and use your Trezor device is an investment in your long-term digital safety.
In this EEAT-style guide, you’ll learn how to set up, secure, back up, and manage your crypto easily using the latest version, Trezor.io/start v24.12.3. This article is optimized for Bing search ranking, highly authoritative, and written to ensure clarity and trust.